Let’s create an application which can be used to schedule any kinds of jobs with spring boot. In this blog, we will be using a famous open source java library for scheduling named Quartz Scheduler.
As an example, we will be creating an email scheduling application to schedule emails. But remember, it can be used to schedule any kind of Jobs.
And also we will explore all of the CRUD operations involving quartz-scheduler.
Let's get started.
First Step
Let’s create the application.
Head out to Spring Initializr.
URL - https://start.spring.io/
Fill out the blanks required and add below dependencies.
After that, click on Generate and download the project zip to your workspace. Now, unzip the project and import the project in your favourite IDE and start working.
So, now we have a starter spring boot project with some dependencies. Soon, as we start working, we will add other dependencies as well.
Dependencies
We need quartz dependency. So, let's add it in the pom file.
Let's also add the mail dependency to our pom file.
Make sure to explore the dependencies added and its purpose.
Spring profiles
For each environment, we will have different profile and different properties. So, as a first step in our project, we will set up the spring profiles.
In src > main > resources, there is already an application.properties file.
The properties which will be common across all environments will be written here.
Now, In the same location let’s create a file with name application-local.properties.
Let’s use application-{env}.properties as convention for different environments.
When the application is deployed, the application need to pick the properties file according to the environment. So, at the top of the QuartzSchedulerApplication
class, add this configuration annotation.
@Configuration("classpath:application-" + "${spring.profiles.active}" + ".properties")
If no profile is mentioned, the default profile will be default.
Configuring Mysql Database and Quartz Scheduler
One of the many advantages of quartz scheduler is to persist jobs.
What does that mean?
If a failure occurs and application stops. When we restart the application, the previously scheduled jobs data is not lost as it persists the job information. So, when the application comes back, the missed jobs can run again.
Lets install the mysql database first. Before that, install the docker.
Developer tip - Just install docker and whenever you may need anything like mysql, Postgres, monogdb etc, pull the respective docker image. No hassle of installing and configuring everything.
Just download the image and run the container. If you are new to the world of docker, I recommend you to spend some time on it. It is super useful.
Docker is out of scope for this blog but there are lot of good resources out there.
Refer this doc for installation - https://docs.docker.com/engine/install/
Pulling mysql image
docker pull mysql
Verify the image with below command
docker images
Running the mysql container
docker run -p 3306:3306 --name mysql -e MYSQL_ROOT_PASSWORD=root -d mysql:5.7
The above command will run the container in detached mode. In laymen terms, it will be running in background. It will bind to 3306 on our local system. So, our mysql is running on port 3306.
Accessing the container
Execute the below commands to go into the container and from there we will access the mysql console.
 docker ps

 docker exec -it containerId
You will logon to bash terminal of the container. You can login to mysql console by typing below command.
mysql -proot
Remember, by default user root is created and we gave the password as root.
If you have Mysql workbench, connect to it with username and password as root and host and port as localhost and 3306 respectively.
Quartz tables
Quartz Scheduler has its own schema. It has its own tables which needs to be created along with our application tables.
I have included all the tables in file quartz_scheduler/scripts/mysql_tables.sql
We will copy this sql script to docker container, so you don’t have to copy and paste the queries on sql console. It is not very elegant to copy the scripts as text and paste on the mysql console as it is bound to formatting errors.
Elegant way
Open another terminal and type below commands in the bash shell
 cd quartz_scheduler/scripts/;

 docker cp mysql_tables.sql containerId:/
The last command will copy the sql script to root location of the container i.e /
Creating the tables
So, lets create a database named quartz_scheduler.
 create database quartz_scheduler;

 use quartz_scheduler;

 source mysql_tables.sql;
Now, the quartz tables are created and also one table related to our application, let’s move on to developing the application.
Application requirements
Before moving any further, let's discuss about the requirements, create the API contracts.
The requirements are really simple
- The user should be able to create a schedule to send an email at specific time on a specific date.
- The user should be able to view all the schedules created and active and also individual schedule by schedule Id.
- The user should be able to update the schedule like mail content and schedule time.
- The user should be able to delete the schedule as well.
- Version one will contain only single fire schedules. No recurring ones. This means, schedules fired will be deleted after completing the job. But schedules can be updated as long as they are not fired.
Simple Just four APIs. Let’s not complicate it any further. Just the CRUD operations.
Mail Schedule Table
 schedule_id BIGINT AUTO_INCREMENT,
 username VARCHAR(50) NOT NULL,
 to_email VARCHAR(100) NOT NULL,
 schedule_datetime VARCHAR(200) NOT NULL,
 schedule_zoneId VARCHAR(200) NOT NULL,
 is_deleted TINYINT(1) NOT NULL,
We will discuss more about the table in the APIs section.
Here, username is used to identify a user in the application. A user will have control on schedules created by him only. And rest of the fields are self explanatory.
Quartz Scheduler Terminology
Before starting the development, actually we should know a bit about quartz scheduler terminology. This will very helpful while development.
The key components are
- Scheduler - It is the main interface for interacting with the job scheduler. Jobs and Triggers are registered with the Scheduler.
- Job - It is the interface to be implemented by the classes that represent the Job in Quartz and it has a single method executeInternal() where the work needs to be done will be written.
- Job Detail - It represents instance of a job. It stores the type of job needs to be executed. Additional information is stored in job data map. It is identified by a job key which consists of a name and group. Job builder is used to construct job detail entities.
- Trigger - A trigger is a mechanism to schedule a job. It is also identified by a trigger key which consists of a name and group. TriggerBuilder is used to construct trigger entities.
More information about quartz can be found here.
Let’s Begin the development
Provide spring.datasource properties and quartz properties as per mysql installation.
Here I am using hikaricp for my connection pool of 5 threads for quartz.
Springboot default connection pool is hikaricp and default size is 10 for your information.
Now you can run the application with the given profile using the property
-Dspring.profiles.active=local
Writing the APIs
Lets create a folder named controller at path - quartz-scheduler/src/main/java/com/pranay/quartz/
Inside the controller folder, let’s create a class with name AppController. It will contain all the APIs.
Similarly, let’s create a folder named service at the same path as controller. It contains the business logic.
Let’s create a Dao layer where we will have just the DB operations. Nothing more. Just the code interacting with DB and exception handling in case of DB failures.
We will Java Persistence API to abstract out the complexity of writing the database queries and playing with data directly.
The flow is from controller to service to Dao layer and from there it is reverse. We will ignore the filters for this post. It will come become controller.
Adding the swagger
Swagger is a set of open-source tools built around the OpenAPI Specification that can help you design, build, document and consume REST APIs.
The below swagger config lets us filter out the controllers to be exposed.
Let's create the Rest APIs to schedule the email jobs via gmail in Quartz Scheduler.
Also, previously mentioned mail schedule table is for our convenience to keep track of which schedules are created and which are active.
Create the Mail Schedule
First, let's define the request to create a mail schedule . Let's see what properties we need to create a Schedule.
List all the mail schedules and get schedule by Id
Update the Mail Schedule
Delete the Schedule
Mail Schedule Job
Enabling Gmail's SMTP access
ScreenBefore getting started with testing our application, we need to enable SMTP access in gmail to allow our application to send emails using Gmail. It is disabled by default.
- Go to URL - https://myaccount.google.com/security?pli=1#connectedapps
- Go to Security, and enable Allow less secure apps.
Running our application
mvn spring-boot:run -Dspring-boot.run.arguments="--spring.profiles.active=<env> --spring.mail.password=<YOUR_SMTP_PASSWORD>"
For this blog, you can set env=local and provide your password. You can generate an app password for here.
Testing from swagger
Once the application is up, we can now start creating the mail schedules.
Type the below URL in your browser.
URL - http://localhost:8080/swagger-ui/index.html
You should see the swagger UI like below.
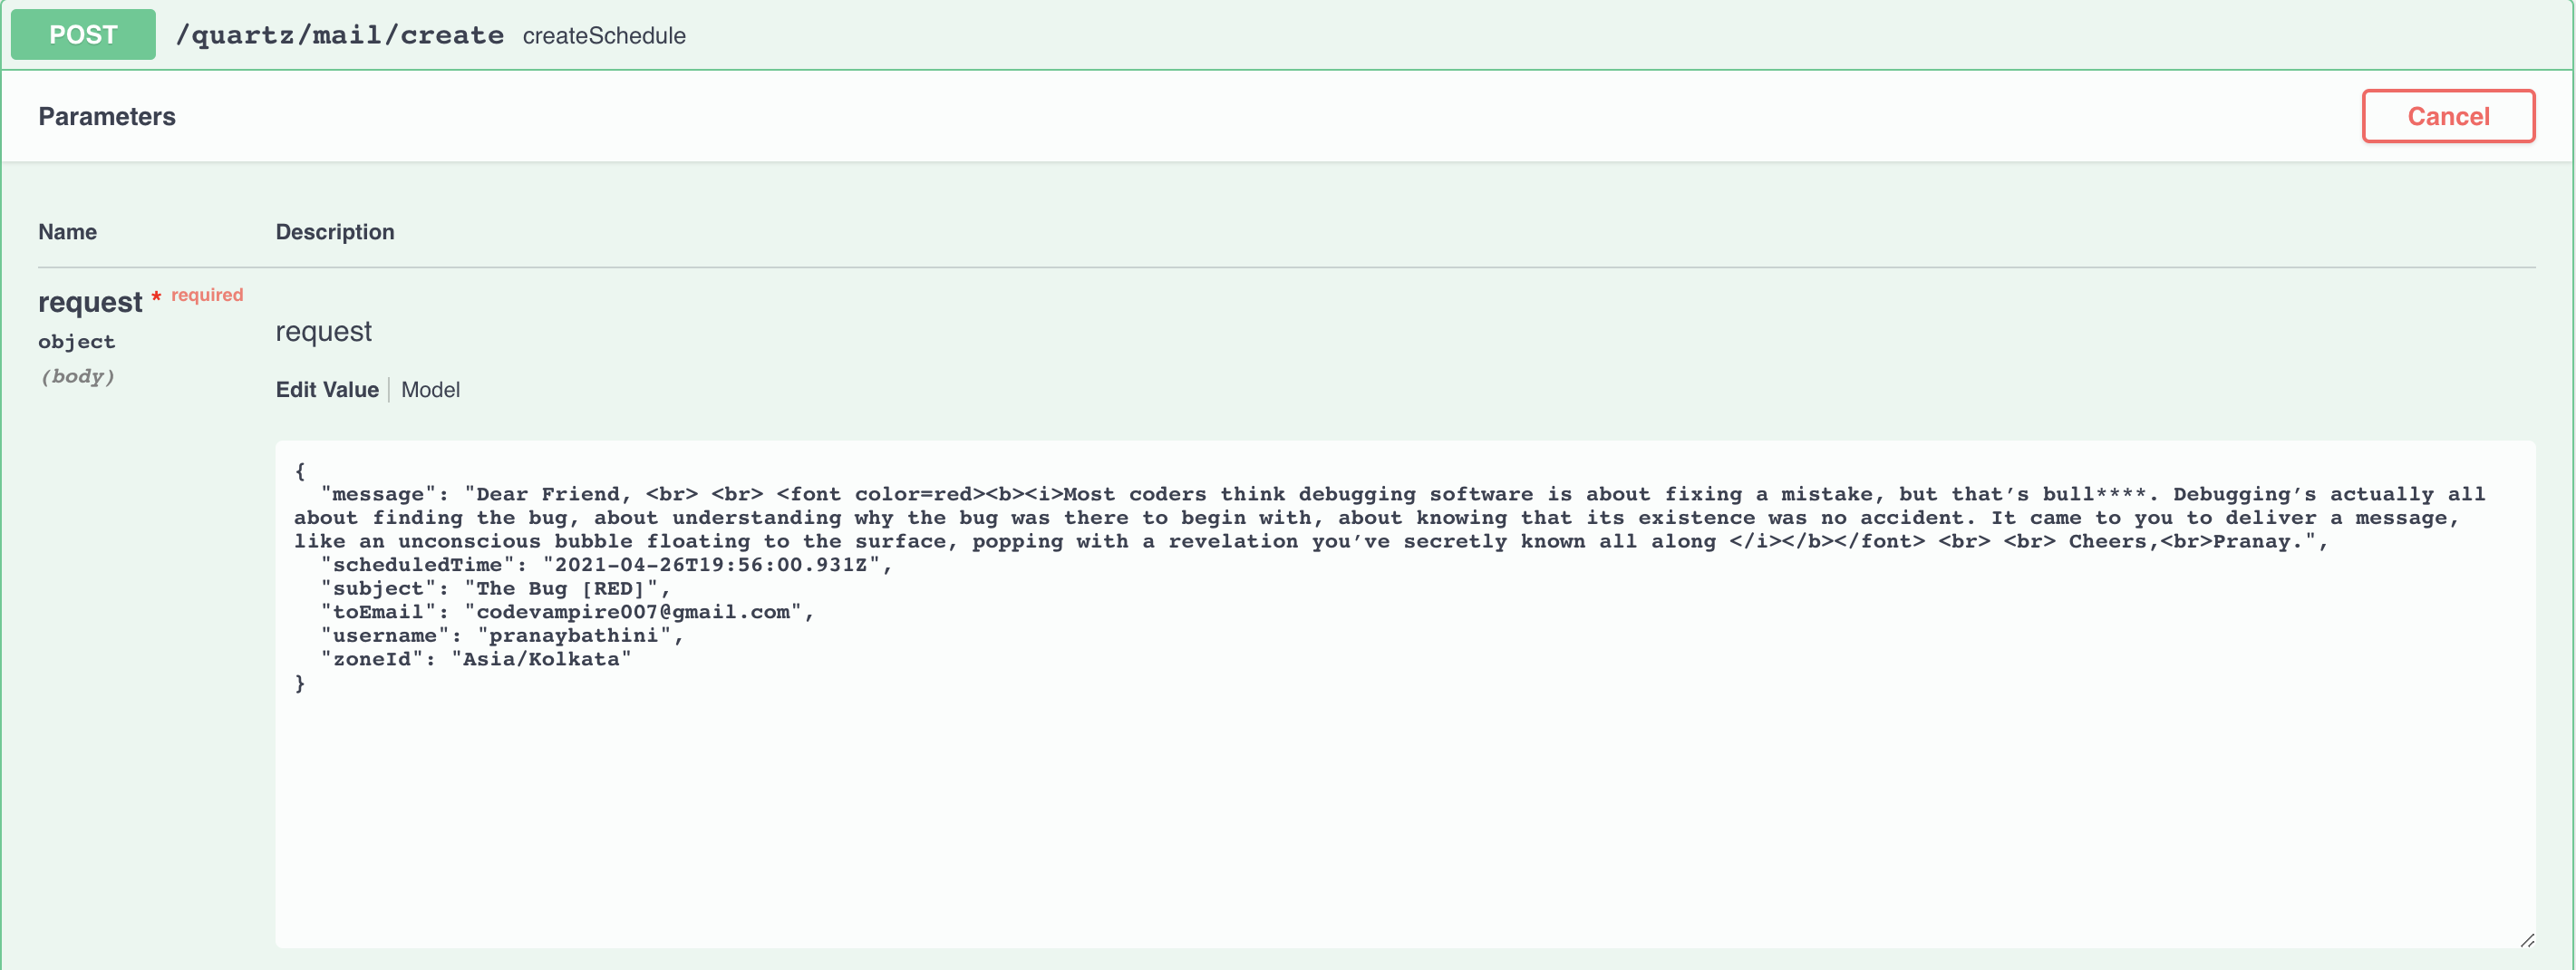
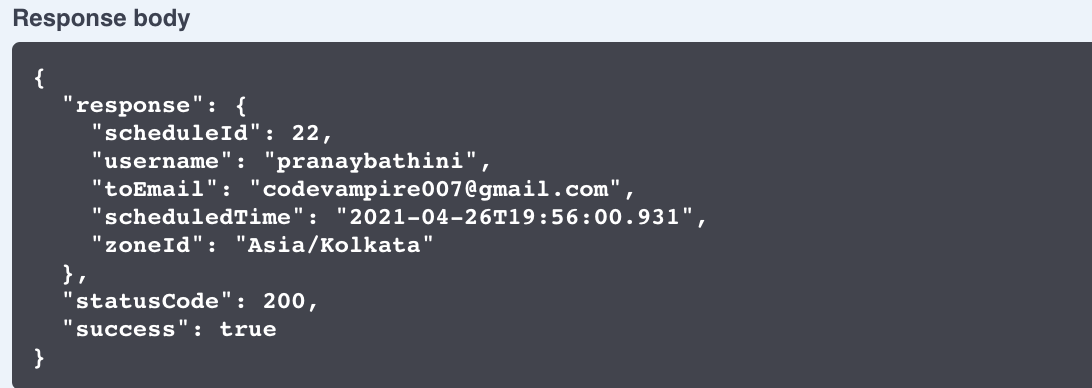
Let's create a schedule.
Request
Response
Got the mail at specified time
Update the schedule.
Create another schedule with same content. later update via update API from swagger.
Deleting the schedule
List the schedule
Postman Collection
The postman collection of the above APIs can be found here - Postman Collection
Github Repo
The above code can be found below
Link - https://github.com/pranaybathini/quartz-scheduler
Custom Email Templates
- https://www.baeldung.com/spring-email-templates
- https://stackoverflow.com/questions/49997222/how-can-i-read-an-html-template-from-a-file-to-send-a-mail-with-it-using-the-jav
Keep Experimenting 🔎
Keep Learning 🚀


Post a Comment